Stop Pop-Up Ads on an Android Phone
You can easily block Pop-up ads on Chrome for Android without using any other app. Below, we have shared a step-by-step guide on how to enable the hidden ad-blocker of Chrome. Step 1. First of all, open the Google Chrome browser on your Android smartphone.
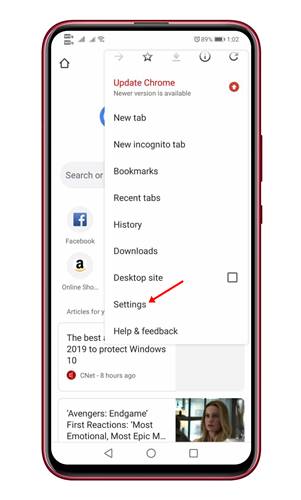
Step 2. In the next step, click on the three-dotted menus and then tap on ‘Settings’
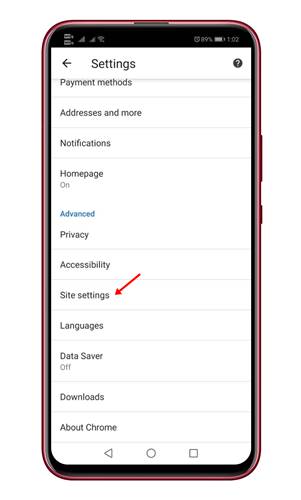
Step 3. Now under the Settings page, you need to find and tap on the ‘Site Settings’
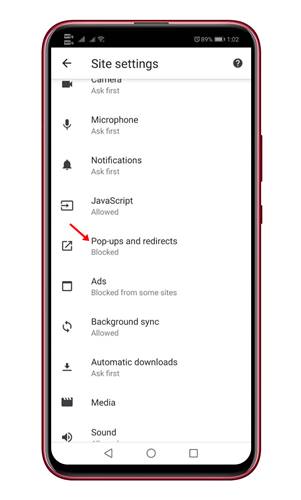
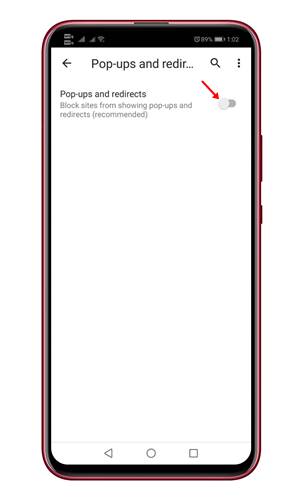
Step 4. Under the Site Settings option, tap on ‘Pop-ups and redirects’
Step 5. Now turn off the ‘Pop-ups and redirects’
That’s it, you are done! From now Google Chrome web browser will block all pop-ups and redirects from any webpage.
Turn On the Data Saver
Well, we understand Data Saver has no link with the Pop-Up ads, but still, it minimizes the number of pop-up ads that show up. So, turning on the Data saver is a win-win situation either way since you will be saving a few extra data while blocking pop-up ads. Here’s how you can turn on the Data Saver on Android. Step 1. First of all, open the Google Chrome browser on your Android smartphone.
Step 2. In the next step, tap on the three-dotted menus and tap on ‘Settings’
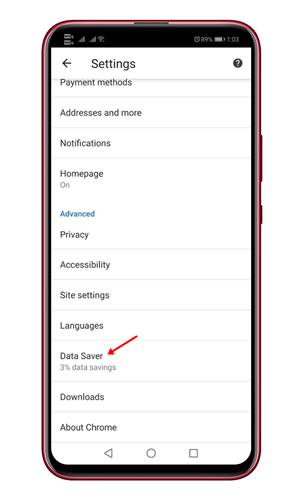
Step 3. Under the Settings Page, find and tap on the ‘Data Saver‘ option.
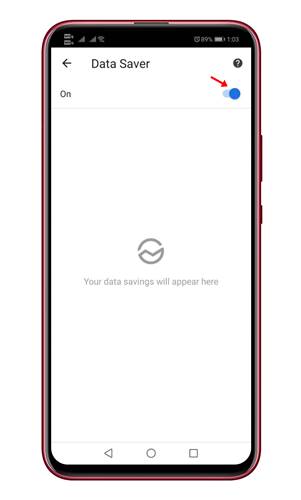
Step 4. Now turn on the ‘Data Saver’ option.
That’s it, you are done! This is how you can turn on the Data Saver on Google Chrome for Android to block pop-up ads.
Using AdGuard DNS
To block pop-up ads, you can use AdGuard DNS. It’s a private DNS that blocks ads system-wide. Here’s how to set up and use AdGuard DNS on Android. Step 1. Open Settings on Android.
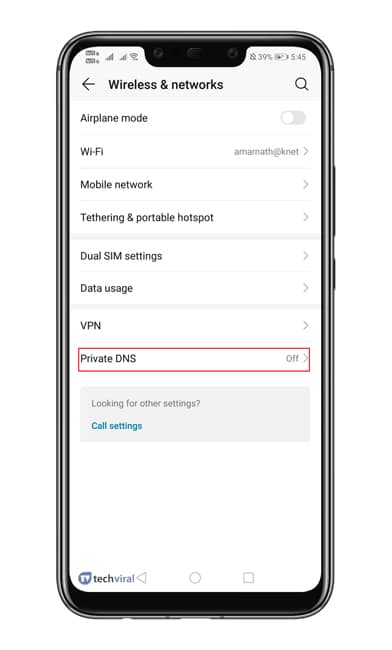
Step 2. Now tap on the ‘Network & Internet’ Step 3. On the next page, tap on the ‘Private DNS’ option.
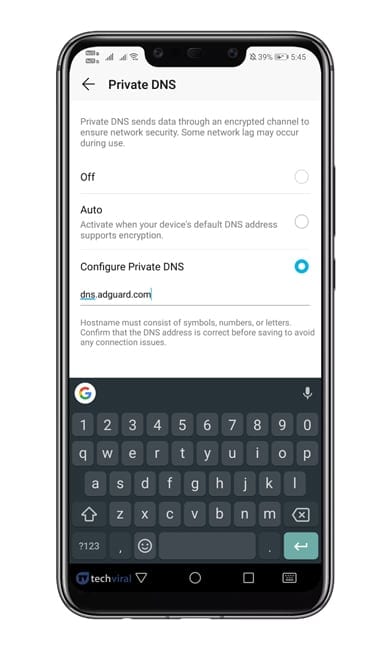
Step 4. Now select configure private DNS, and under the hostname enter – ‘dns.adguard.com’. Once done, save the settings.
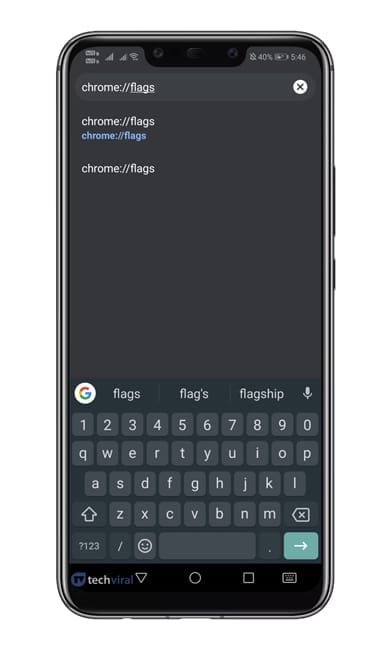
Step 5. Now open the Chrome browser, and head to the ‘Chrome://flags’
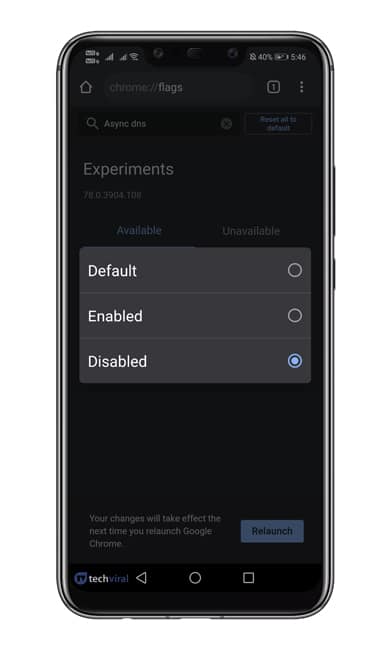
Step 6. Search for ‘DNS’ and disable the ‘Async DNS’ flag.
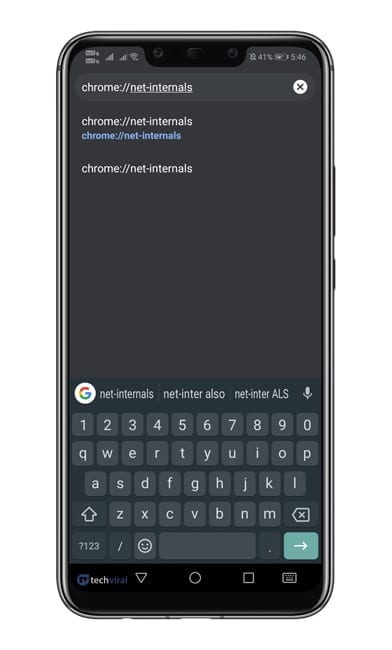
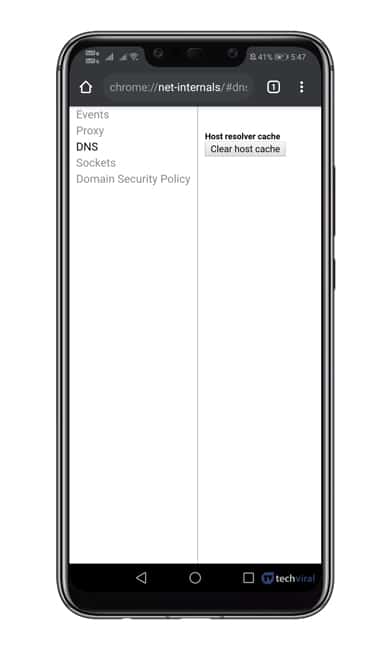
Step 7. Now enter ‘chrome://net-internals’ on the address bar and hit enter.
Step 8. From the DNS tab, tap on the ‘Clear Cache’ option. Once done, restart your Chrome browser. You will no longer see ads.
Conclusion
So, these are the three best methods to stop pop-up Ads on an Android smartphone. If you know any other method to block pop-up ads on Android, let us know in the comment box below. I hope this article helped you! Please share it with your friends also.
Δ