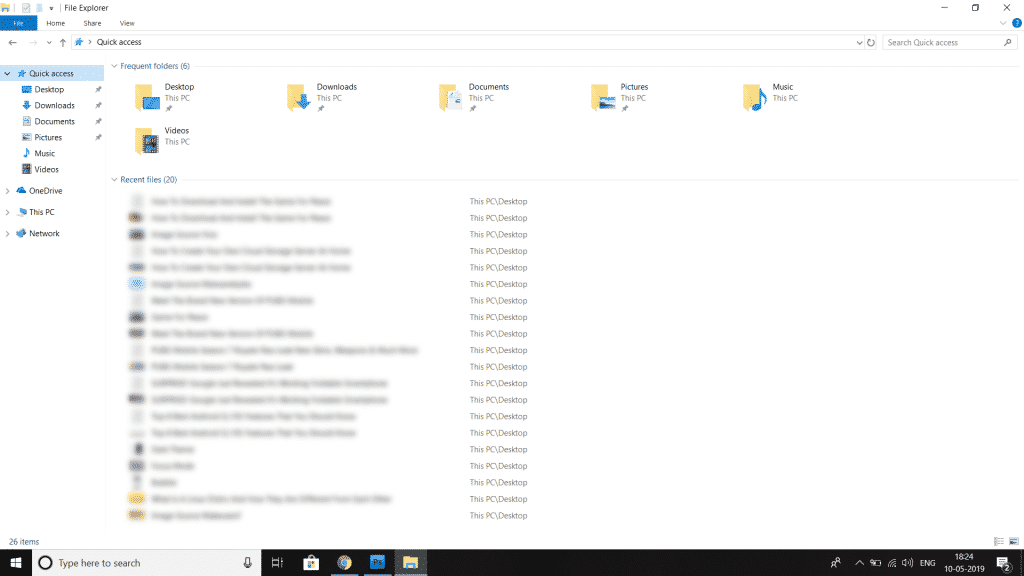
With the arrival of Windows 10, the file browser received some features and changes. For example, Windows 10 shows the file that you have recently access right on File explorer. For some users, this feature might be helpful, but it could be a nightmare for others. Many users share their computer/laptop with others and wouldn’t like to show what they have accessed on the computer. So, they choose to disable the recent files in Windows 10’s File Explorer.
Steps to Remove/Disable Recent Files From File Explorer
So, in this article, we will share a step-by-step guide on how to remove or disable the recent files option from Windows 10’s file explorer. Let’s check out. Step 1. The recent file information is stored in the form of data in the cache, and here we are going to show you all that how we can erase or hide them in several ways.
Step 2. One of them is to delete them manually and for this, the first thing that we have to do is press the “Win + R” keys to open the RUN dialog box. Step 3. On the RUN dialog box, enter: %AppData%\Microsoft\Windows\Recent and then click OK. Now you will get a file browser window in the path where Windows 10 saves that recent file listing now. To remove them, select all the elements of the window and then hold the Shift key and press the Delete button to remove them all.
How to Disable Recent Files?
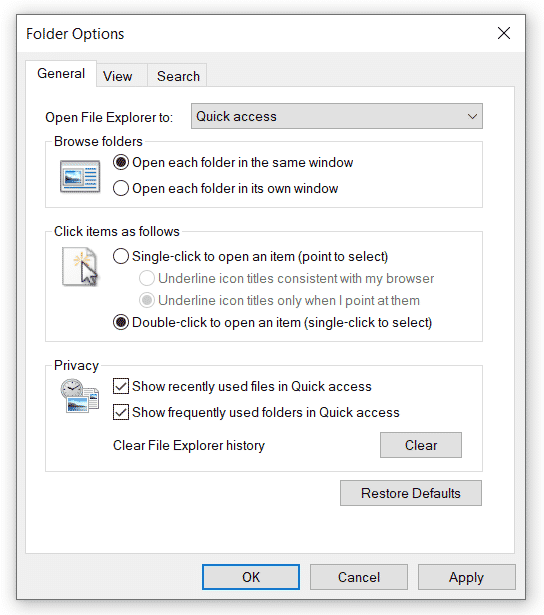
It is also possible to disable or hide the recent files in Windows 10 from the browser itself. And to do this, click on the option of the View menu> Options> Change folder and search options and then select the General tab of the window that opens.
Now there, in the Privacy section, we have to uncheck the Show recently used files in the Quick Access box, then apply and accept the changes to be active. If we want, we can also uncheck the Show frequently used folders in the Quick Access box.
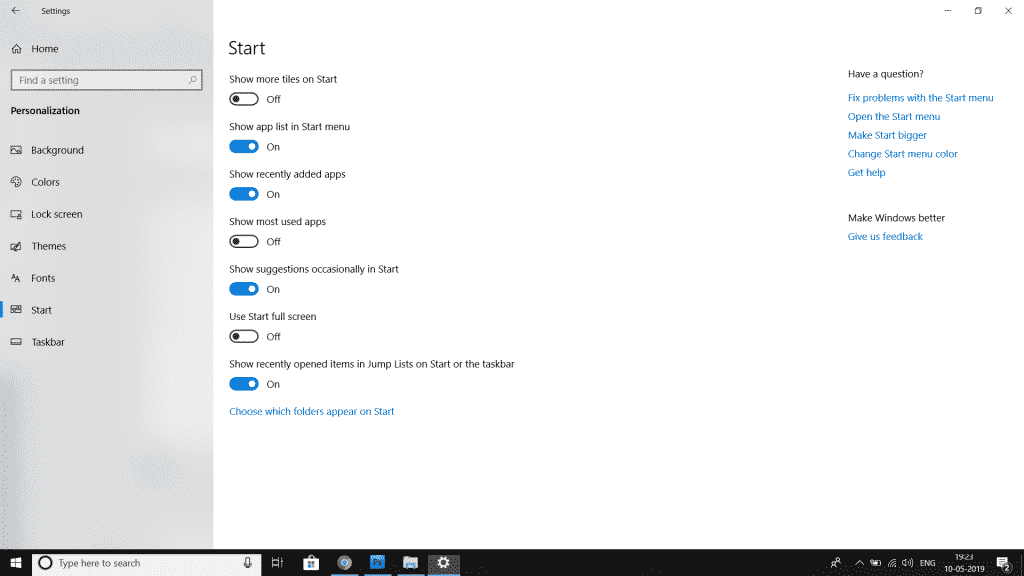
Another simple way to hide recent files from the Windows 10 browser is through the Windows 10 Settings page, and to do so, press the “Win + I” to open it and navigate to the option Personalization > Start. Next, we have to find the option Show recently opened items in Jump Lists on Start or the taskbar and then click the switch to turn off the option. That’s it now you are done. So, what do you think about this? Share all your views and thoughts in the comment section below. And if you liked this post, simply do not forget to share this tutorial with your friends and family.
Δ