The native file compression tool of Windows 11 can create a ZIP file or extract it, but it can’t password protect it. Many third-party file compression tools for Windows allow you to password-protect ZIP files for free. Hence, if you are looking for ways to password protect ZIP files on Windows 11, you have landed on the right page. Below, we have shared the two best methods to create a password-protected ZIP file on Windows 11. Let’s get started.
1) Create a Password Protected ZIP file via 7-Zip
Well, 7-Zip is a free archive program that you can use to create a password-protected ZIP file. It’s pretty easy to create password-protected ZIP files using 7-Zip. You need to follow some of the simple steps we have shared below.
First of all, download & install 7-zip on your Windows 11 computer.
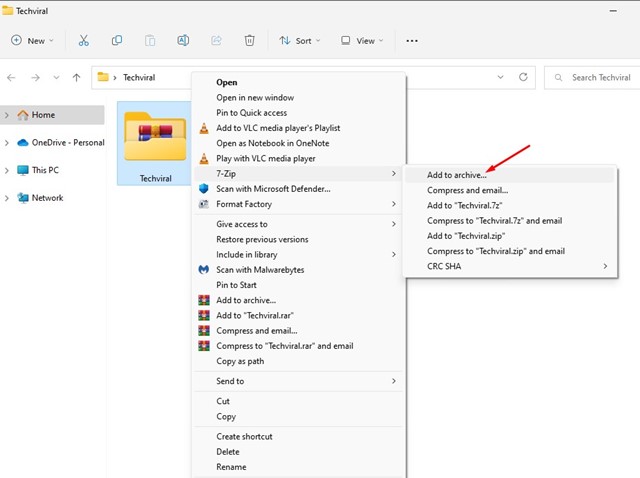
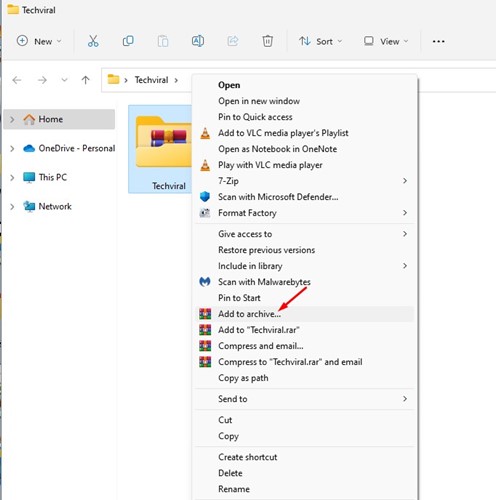
Once installed, right-click on the file or folder you want to add to the archive. Next, select 7-Zip > Add to archive option.
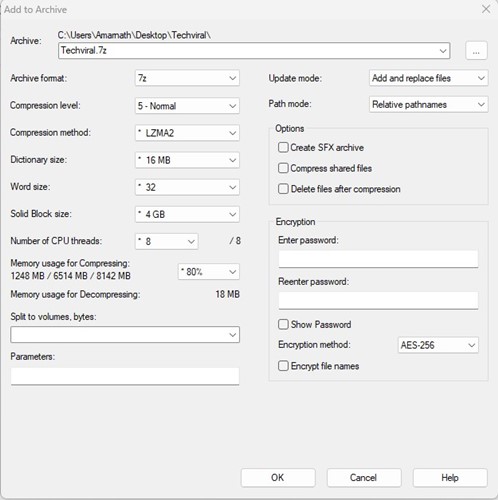
On the Add to Archive window, find the Encryption tab on the right.
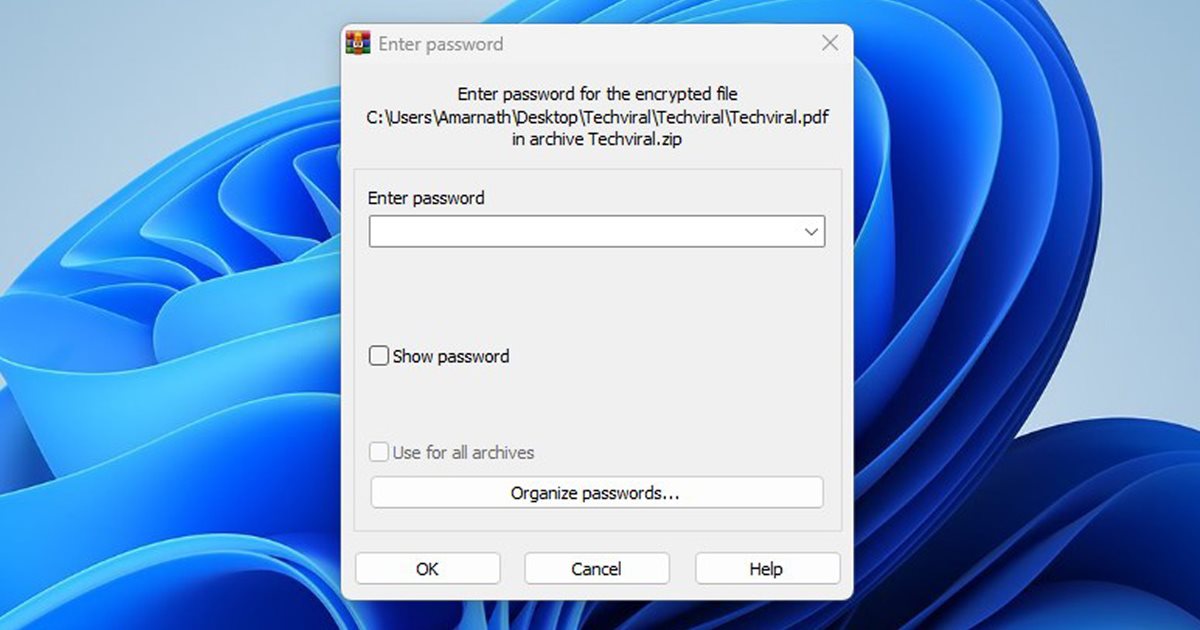
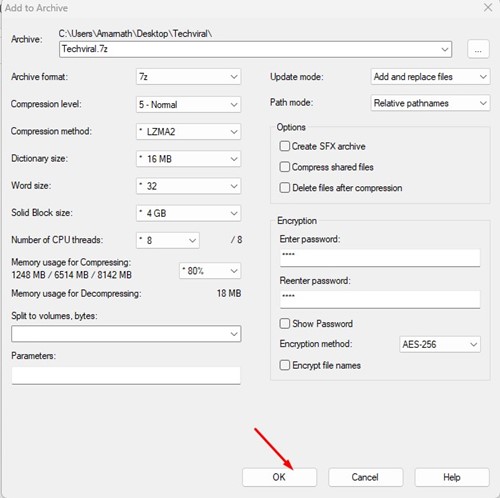
Enter the archive password and reenter the password. Once done, check the ‘Encrypt file names’ option and click on the Ok button.
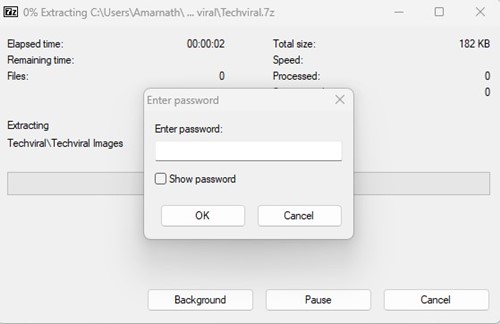
This will create a ZIP file and will password protect it. If you try to access the ZIP file, you will be asked to enter the password.
That’s it! This is how you can password protect ZIP files on Windows 11 using the 7-Zip file compression tool.
2) Create a Password Protected ZIP file using WinRAR
WinRAR is probably the best and most advanced file compression tool for Windows operating system. The latest version of WinRAR is fully compatible with Windows 11, and you can use it to create a password-protected ZIP file.
First of all, download & install WinRAR on your Windows 11 PC.
Once installed, right-click on the file or folder you want to compress. Next, select the ‘Add to archive‘ option on the context menu.
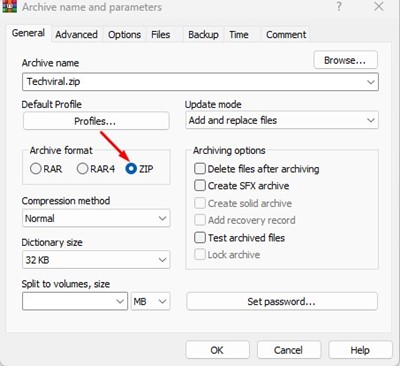
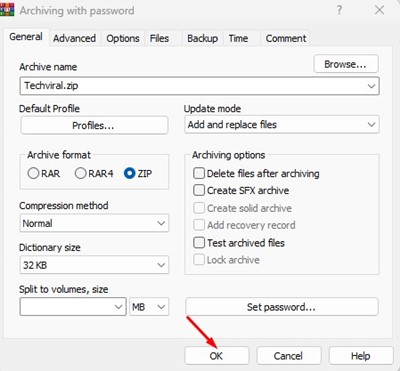
Next, on the Archive name and parameters window, select ‘ZIP‘ on the Archive format.
Once done, click the Set password button on the Archiving options section.
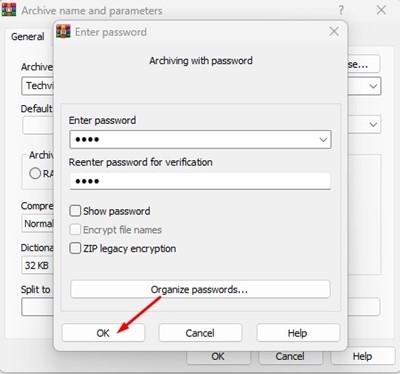
On the Enter password prompt, enter & reenter the password you want to set. Once done, click on the Ok button.
Now, click on the Ok button on the Archive name and parameters window.
That’s it! This will create a password-protected ZIP file on your Windows 11 computer. Now, you will be asked to enter the password whenever you attempt to open the ZIP file. Also read: How to Password Protect Folders in Windows 11 Since Windows 11 doesn’t natively support password-protecting files & folders, creating a password-protected ZIP file is a great option. If you know any other ways to password protect ZIP files on Windows 11, let us know in the comments below.
Δ