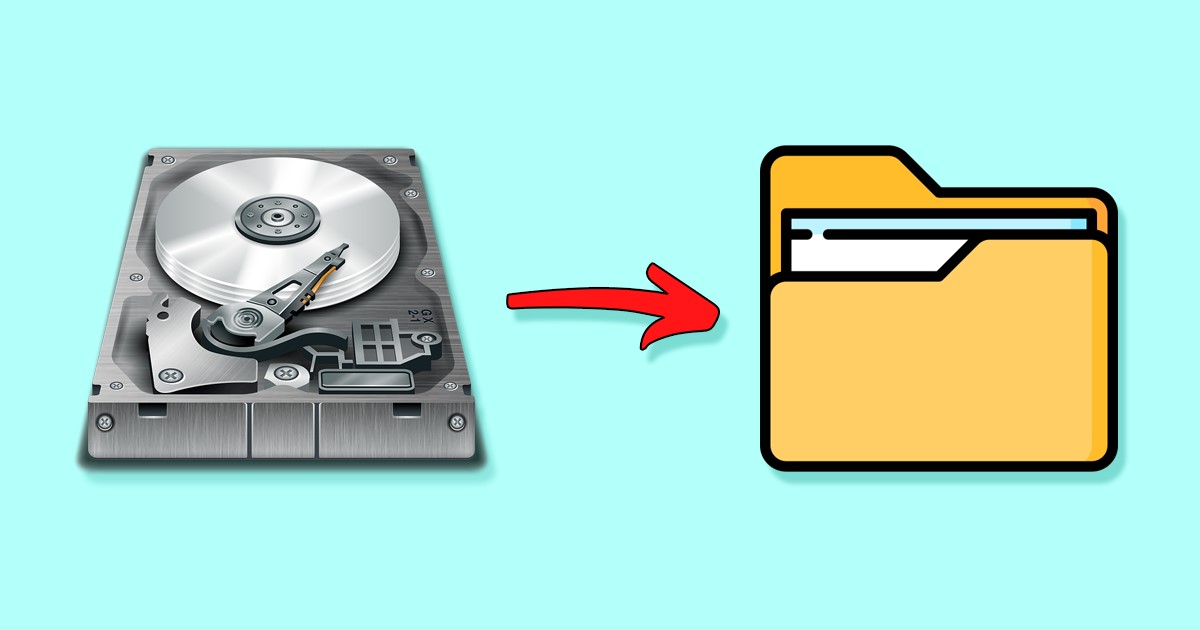
You may find this guide useful if you are searching for the same. Windows 11 allows you to mount or unmount a drive in a folder. This means when you open a folder, you will see the drive’s content appearing on it. This is a great feature and might turn helpful in a few situations. If you mount a drive inside a folder, it will appear as if it is an actual drive – the one you see in your File Explorer. This one will serve as a shortcut file for the actual drive.
Mount or Unmount a Drive in a Folder in Windows 11
So, if you are interested in mounting a drive in a folder in Windows 11, keep on reading the guide till the end. Here we have shared some easy steps to mount or unmount a drive in a folder.
Mount a drive in a Folder in Windows 11 via Settings
In this method, we will use Windows 11’s Settings app to mount a drive in a folder in Windows 11. Follow some of the simple steps we have shared below.
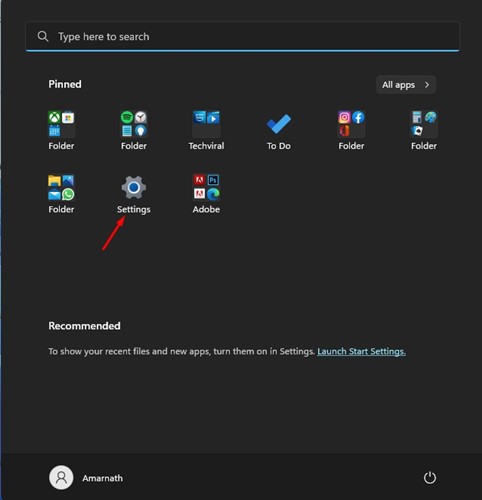
First, click on the Windows 11 Start button and select Settings.
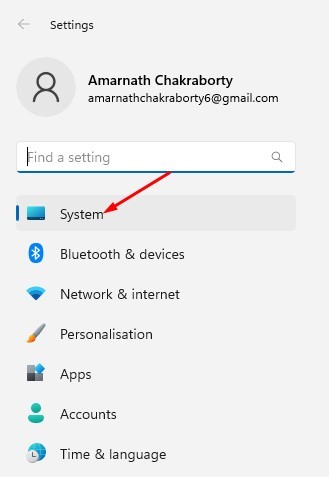
On the Settings app, switch to the System tab, as shown in the screenshot below.
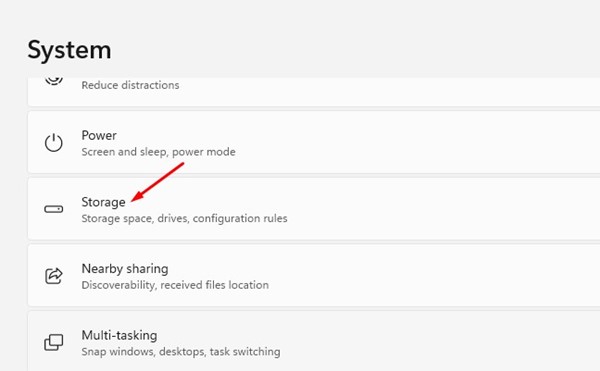
On the right side, scroll down and click on Storage.
On the Storage page, expand the Advanced storage settings option.
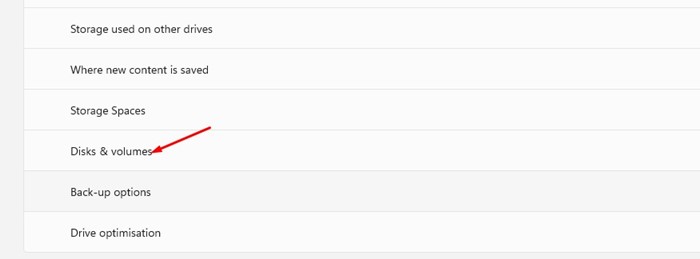
On the expanded menu, click on the Disk & Volume.
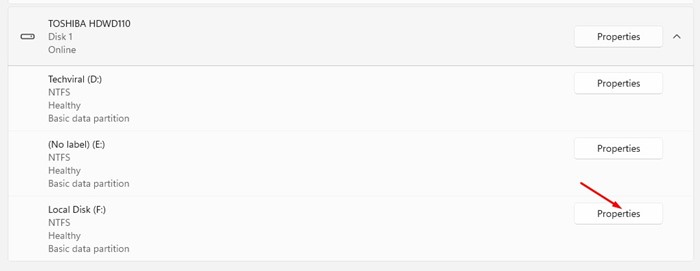
Now, click on the Properties button beside the drive you want to mount in a folder.
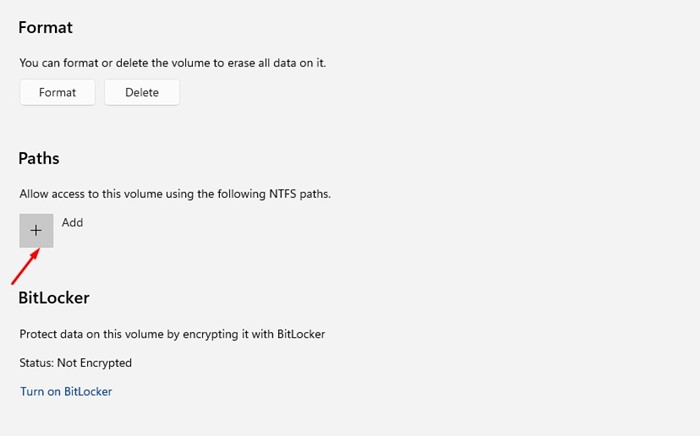
On the Paths, click on the (+ Add) button.
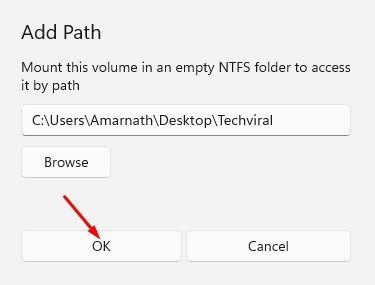
On the Add Path prompt, enter the path of the folder where you want to mount the drive. Once done, click on the Ok button.
That’s it! Now open the folder where you have mounted the drive. You can now access the drive’s content from that folder.
Unmount a Drive from a Folder in Windows 11
If you don’t want to access the drive from a folder, you can unmount it in easy steps. Here’s how you can unmount a drive from a folder in Windows 11.
First, click on the Windows 11 Start button and select Settings.
On the Settings app, switch to the System tab, as shown in the screenshot below.
On the right side, scroll down and click on Storage.
On the Storage page, expand the Advanced storage settings option.
On the expanded menu, click on the Disk & Volume.
Next, click the Properties button beside the drive you’ve mounted in a folder.
On the next screen, click the Remove button underneath the assigned path.
That’s it! After making the changes, restart your Windows 11 computer. This should unmount the drive from your selected folder. Also read: How to Change Drive or Volume Label in Windows 11 You can mount a drive in a folder to quickly access your frequently accessed drive. So, these are some simple steps to mount or unmount a drive in a folder on Windows 11 computer. If you need more help related to mounting or unmounting a drive in a folder in Windows 11, let us know in the comments below.
Δ