Although we don’t use CRT monitors these days, screen savers now feel irrelevant. However, the thing is that Microsoft included the Screensavers options even in the latest release of Windows, i.e., Windows 11. Many users still prefer to apply Screensavers on their LCD or LED screen. So, if you are using the latest version of Windows 11 and wish to apply Screensaver on your computer, you are reading the right article. Also read: How to Install Windows 11 From USB (Full Guide)
Steps to Enable Screen Saver in Windows 11
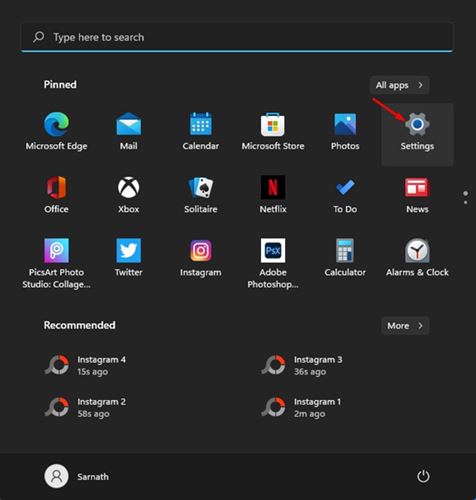
In this article, we will share a step-by-step guide on how to apply classic screensavers on Windows 11. The process is going to be very easy. Just follow some of the simple steps given below. Step 1. First of all, click on the Windows 11 Start menu and select ‘Settings‘.
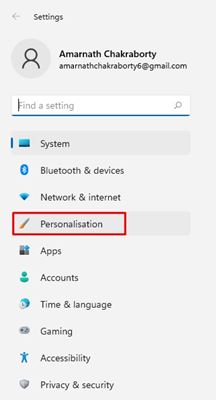
Step 2. On the Settings page, click on the ‘Personalization‘ option.
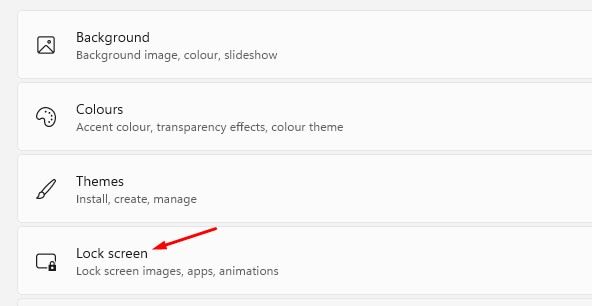
Step 3. Next, click on the ‘Lock Screen’ tab.
Step 4. On the Lock Screen page, click on the ‘Screen Saver’ option.
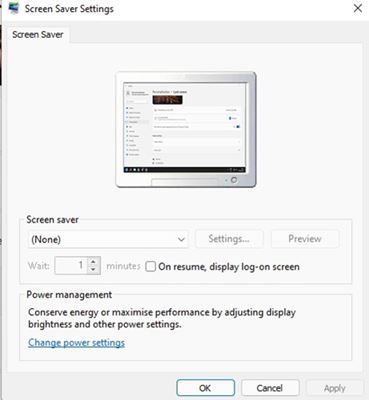
Step 5. Now you will see a Window displaying the Screensaver options.
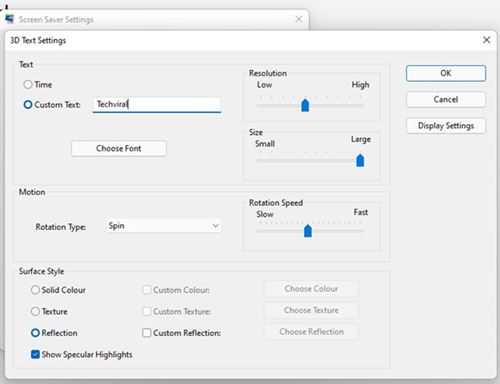
Step 6. Click on the drop-down menu behind Screen saver to select the screen saver of your choice. Step 7. If you want to use the classic 3D text option, select 3D text on the Screensaver, and click on the ‘Settings‘ button next to it. Step 8. Add the custom text, select resolution, size, rotation speed, surface style, and more on the next screen. Once done, click on the ‘Ok‘ button.
That’s it! You are done. This is how you can enable screensavers on Windows 11. So, this guide is all about how to enable Screensavers on Windows 11. I hope this article helped you! Please share it with your friends also. If you have any doubts related to this, let us know in the comment box below.
Δ

