Since there are no restrictions on creating user accounts, sometimes we end up creating more accounts than we need. Yes, you can quickly delete the profiles that you don’t need, but what if you want to use them in the future? In that case, you need to disable the account instead of deleting them. On Windows 11, it’s pretty easy to disable a user account. You can do it via Settings or by editing the Registry File. The disabled user profile won’t appear anywhere on the Windows 11 PC, including the user switch menu. Hence, if you are looking for ways to enable or disable user profiles in Windows 11, you are reading the right guide.
2 Best Methods to Disable a User Account on Windows 11
In this article, we will share a step-by-step guide on how to enable or disable a user profile in Windows 11 operating system. The methods will be straightforward; just follow them as we have directed. Let’s check out.
1) Disable User Account via Computer Management
In this method, we will use the computer management settings to enable or disable the user account. Here are some of the simple steps you need to follow.
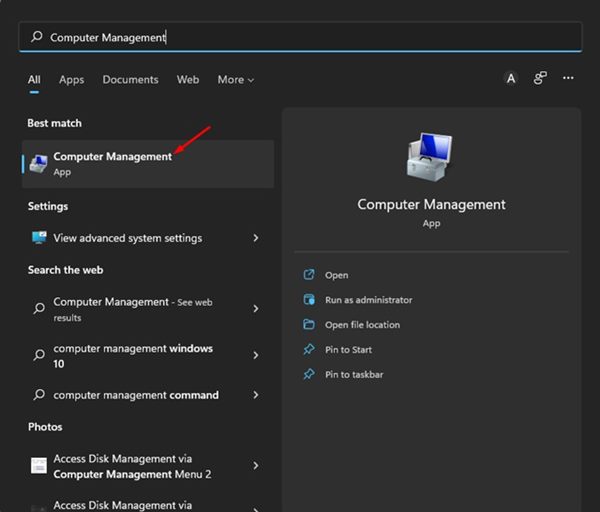
First of all, click on Windows 11 Search and type in Computer Management. Next, open Computer Management from the list of options.
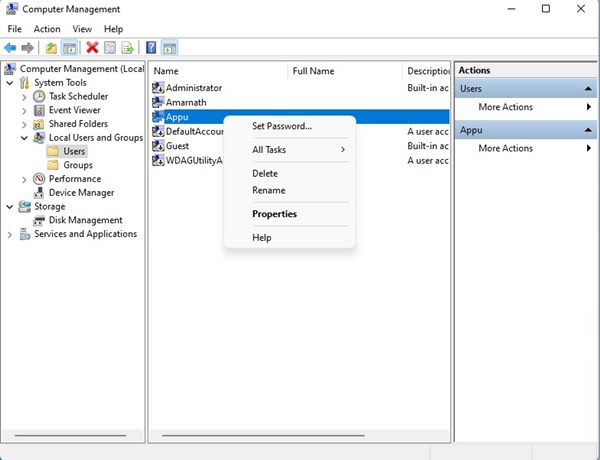
On the Computer Management Window, navigate to the following path: Computer Management > System Tools > Local Users and Groups > Users
Now right click on the user account you want to disable and select Properties.
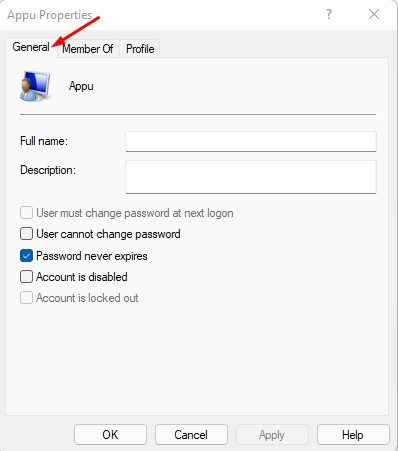
Now, on the Account properties, switch to the General tab as shown below.
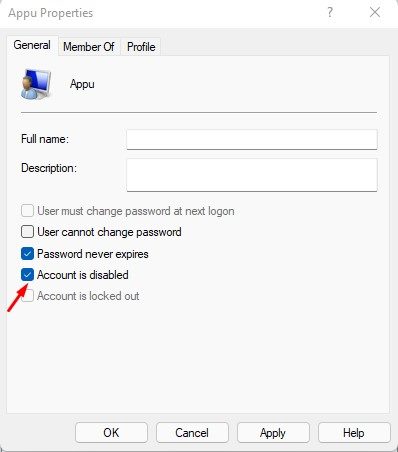
On the General settings, check the option ‘Account is disabled’ and click on the Apply button.
That’s it! You are done. This will disable the user account profile on Windows 11 operating system.
2) Disable User Account on Windows 11 via Command Prompt
In this method, we will use the Command Prompt utility to disable the user account. Here are some of the simple steps you need to follow.
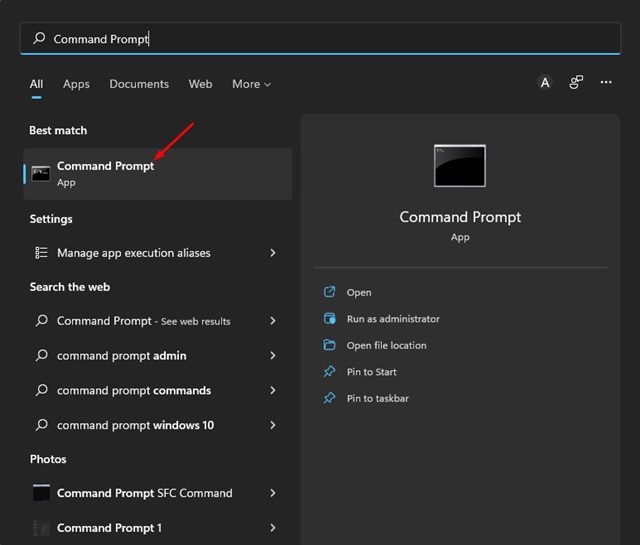
First, click on the Windows 11 search button and type in Command Prompt. Next, right-click on the Command Prompt and select Run as administrator.
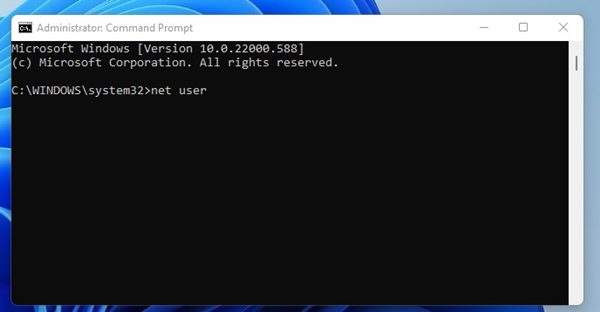
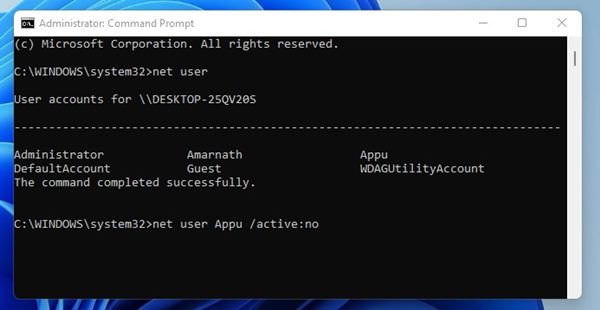
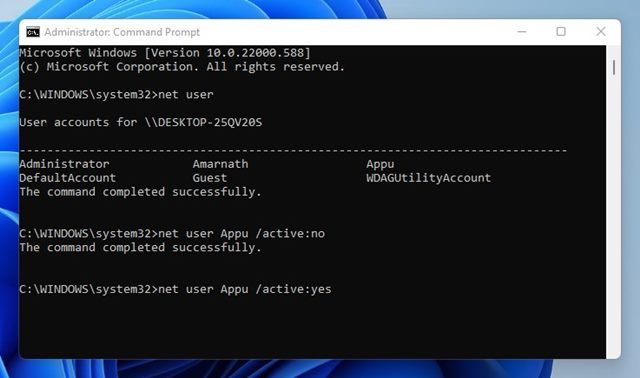
On the next window, type in net user and hit the Enter button.
Now, you will see all user account available on your device. Now enter the following command and hit the Enter button. net user ACCOUNT-NAME /active:no
Important: Replace ‘ACCOUNT-NAME’ with the profile name you want to disable. 4. If you wish to enable the account again, enter the command: net user ACCOUNT-NAME /active:yes
That’s it! You are done. This is how you can enable or disable a user account on Windows 11. It’s pretty easy to disable a user account on Windows 11 operating system. I hope this article helped you! Please share it with your friends also. If you have any doubts related to this, let us know in the comment box below.
Δ