However, creating multiple folders and subfolders manually can be time-consuming. To ease the folder creation process, Windows operating system provides you few utilities. For example, you can use both Command Prompt and PowerShell to create multiple folders. Not only that, but you can even select the directory before creating multiple folders. You need to create a script and run it on the Command Prompt/ Powershell to create multiple folders in just one click. Also read: How to Rename Your Windows 11 PC (2 Methods)
Methods to Create Multiple Folders at Once in Windows 10/11
Hence, in this article, we will share a detailed guide on how to create multiple folders at once in Windows 10/11 operating system. Let’s check out.
1. Create Multiple Folders Via CMD
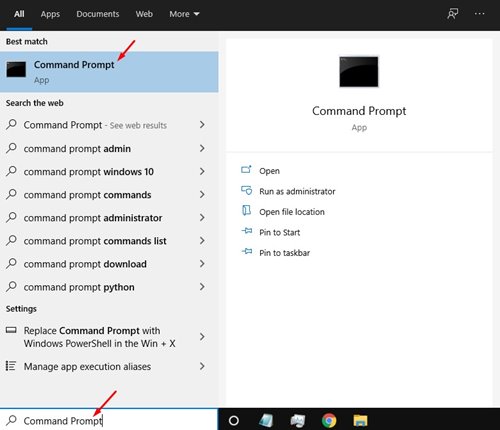
In this method, we will use the CMD to create multiple folders in just one click. Follow some of the simple steps given below. Step 1. First of all, click on the Windows Start button and search CMD. Open Command Prompt from the list.
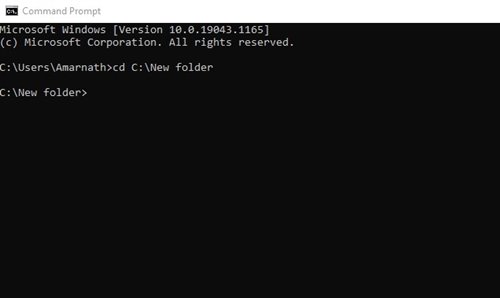
Step 2. On the Command Prompt, you need to select the directory where you want to create multiple folders. You need to use the cd command to switch to the directory. For example: cd C:\New folder
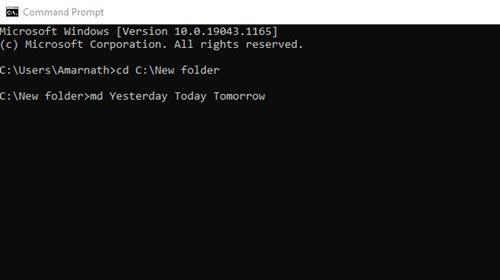
Step 3. Let’s say you want to create three folders – Yesterday, Today, and Tomorrow. You need to execute the command: md Yesterday Today Tomorrow Important: There’s a space between every folder name.
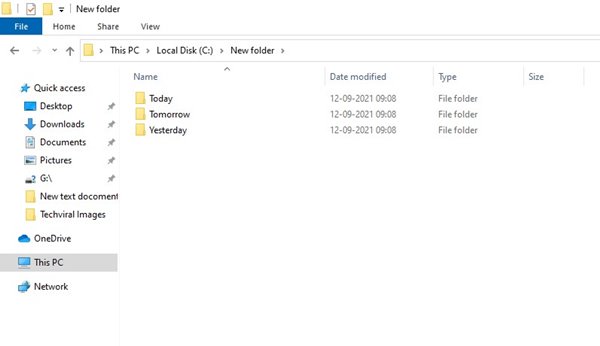
Step 4. After executing the commands, close the command prompt and head to the directory where you have created the folder. You will find your folders there.
That’s it! You are done. This is how you can create multiple folders at once via Command Prompt.
2. Create Multiple Folders via Powershell
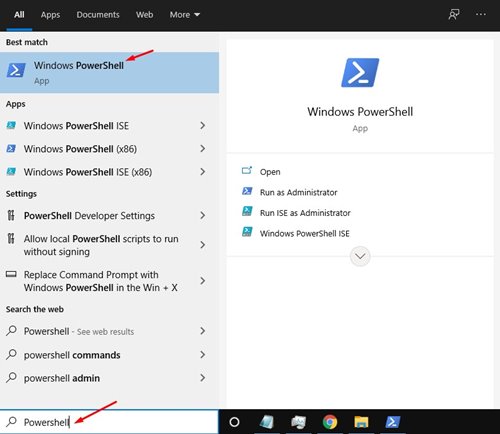
Just like the Command Prompt, you can utilize Powershell to create multiple folders at once as well. Here’s what you need to do. Step 1. First of all, click on Windows 10/11 start button and search for ‘Powershell’. Then, open Powershell from the list.
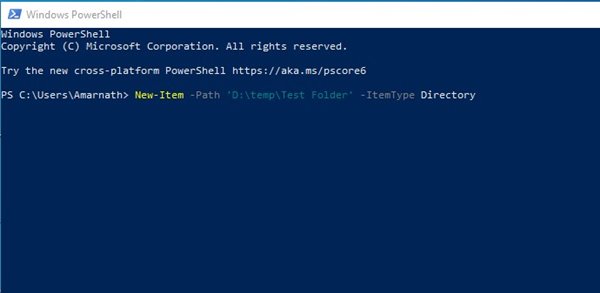
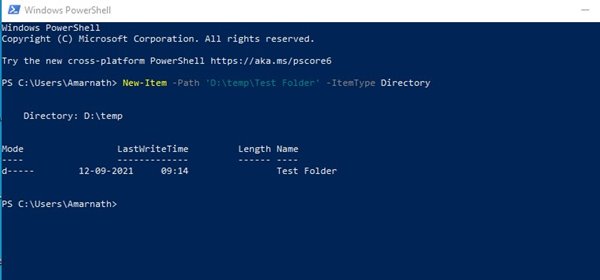
Step 2. Let’s say you want to create three folders – Yesterday, Today, Tomorrow. First, you need to execute the command: New-Item -Path ‘D:\temp\Test Folder’ -ItemType Directory
Important: Here we have created a folder in D:\temp folder. You need to replace the directory. Also, replace the ‘Test Folder’ with the name of the folder you want. Step 3. Once done, hit the enter button and open the directory where you have created the folders. You will find all your folders in that directory.
That’s it! You are done. This is how you can use Powershell to create multiple folders at once in Windows 10. So, this guide is all about creating multiple folders at once in the Windows 10/11 operating system. I hope this article helped you! Please share it with your friends also. If you have any doubts related to this, let us know in the comment box below.
Δ