DNS Cache is simply a database maintained by a computer’s operating system. The database includes the hostname and IP Addresses of the website you often visit or have visited. So, the role of DNS caching involves your operating system or web browser capturing recently visited IP Addresses and saving them in a database. Since it caches the webpages, the DNS Cache ensures a faster loading speed. However, if the DNS Cache gets corrupted, you will see some DNS-related errors while loading specific sites on a web browser. Yes, you can force Windows 11 to flush the DNS cache; however, there may be times when you need to clear the DNS cache of your web browser manually. Modern web browsers like Chrome, Firefox, etc., also saves DNS Cache to improve the page loading speed. Hence, if you are experiencing problems while opening specific websites, you need to clear or flush the web browser’s DNS Cache.
Steps to Flush Google Chrome DNS Cache in Windows 11
This article will show how to clear or flush the Google Chrome DNS cache in Windows 11. The process will be straightforward; make sure to follow it accordingly. Here’s how to clear or flush Chrome DNS cache in Windows 11.
Open the Google Chrome browser on your Windows 11 PC.
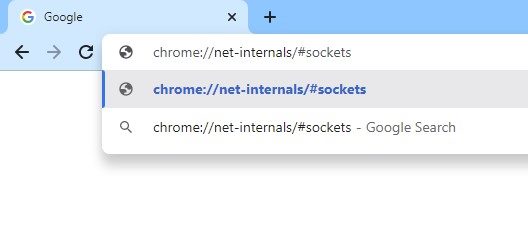
On the address bar, enter the URL: chrome://net-internals/#sockets
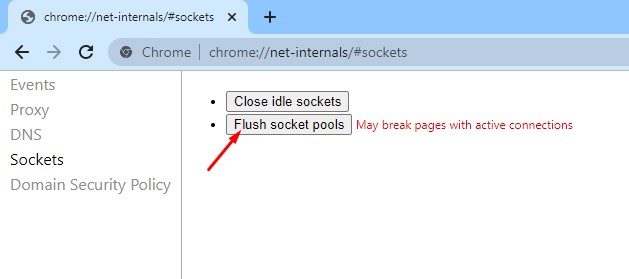
Now, you will see a screen like the one below. Here you need to click on the Flush socket pools.
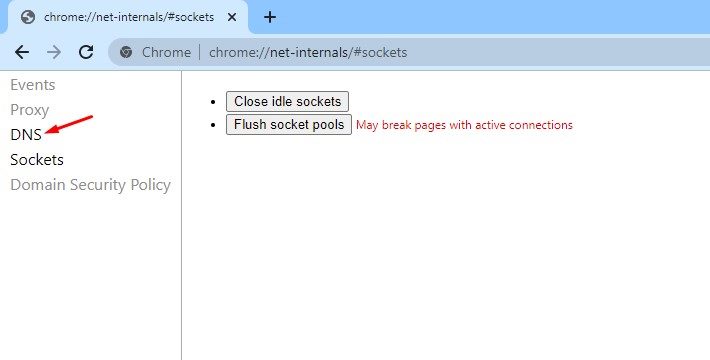
Important: Save your active works on the web browser before you flush socket pools. This will break pages with active connections. 4. Once done, click on the DNS tab on the left pane, as shown in the screenshot below. Alternatively, you can enter this address on your Address bar: chrome://net-internals/#dns
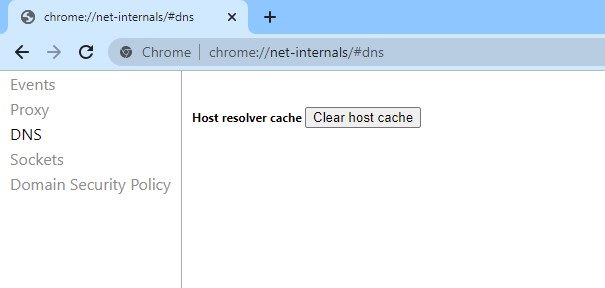
On the right pane, click on the Clear host cache button as shown below.
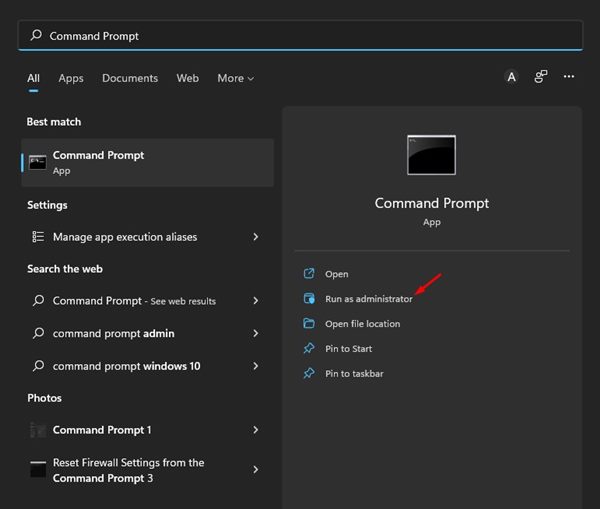
After making the above changes, close the web browser. Next, open Windows 11 search and type in Command Prompt. Right-click on the Command Prompt and select Run as administrator.
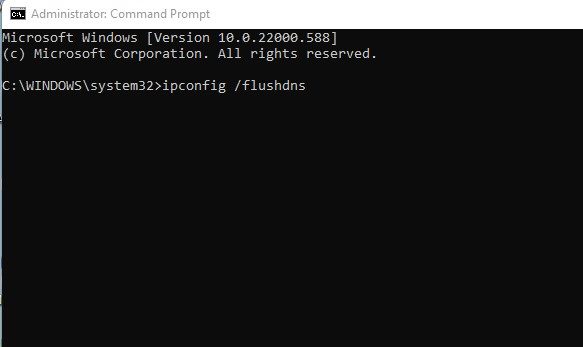
On the Command Prompt, execute the command given below and hit the Enter button. ipconfig /flushdns
That’s it! You are done. After implementing the above changes, restart your Windows 11 computer. These are simple steps to clear or flush Google Chrome DNS Cache in Windows 11. I hope this article helped you! Please share it with your friends also. If you have any doubts about this, let us know in the comment box below.
Δ
