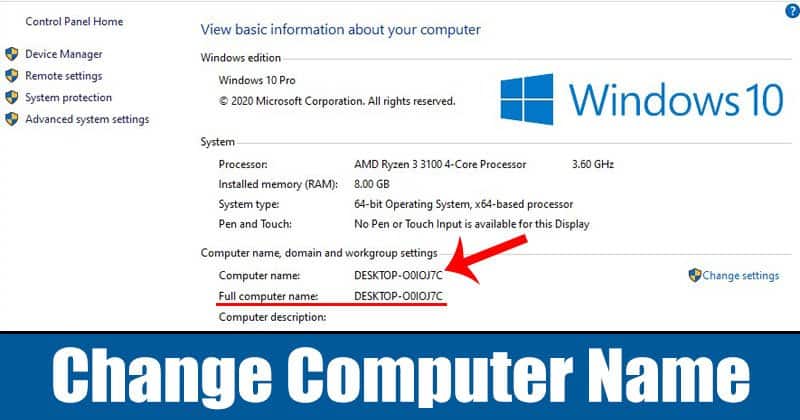
If you have multiple devices at home like desktop, smartphone, tablet, laptop, and connect those devices with the wireless network, it’s best to change the computer name. Changing the computer name will make it easy for you to identify your computer in a network. Also Read: Best Ways to Reset or Recover Windows 10 Password
3 Methods to Change Your Computer Name in Windows 10
Please note that we are talking about the computer name here, not the user account name. Lots of users get confused between the two. This article will share a detailed guide on how to change the computer name in Windows 10. Let’s check out.
1. Using Windows Settings
Well, you can use the Windows Settings app to change the Windows 10 computer name. Follow some of the simple steps given below. Step 1. First of all, press Windows Key + I on your computer to open the Settings.
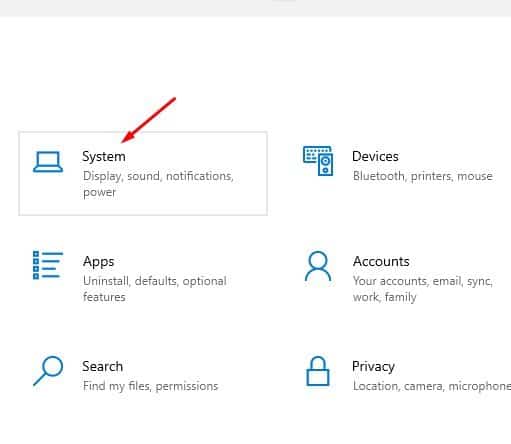
Step 2. On the Settings, click on the ‘System.’
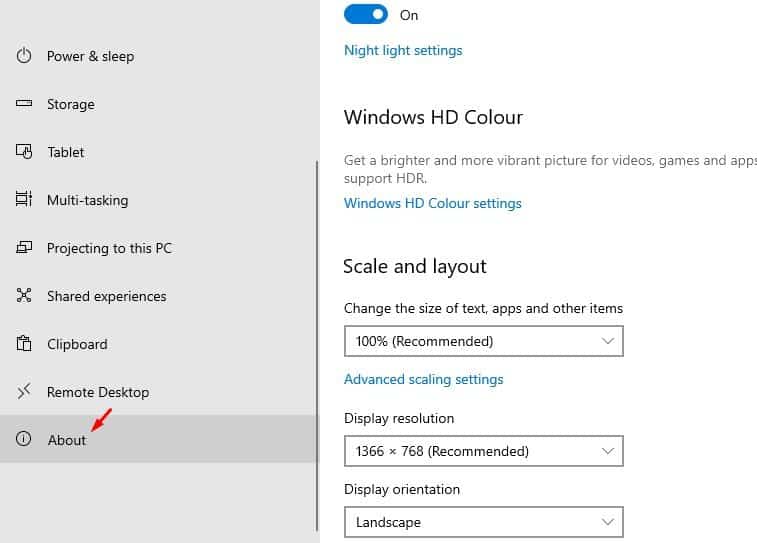
Step 3. On the left-hand side pane, select ‘About.’
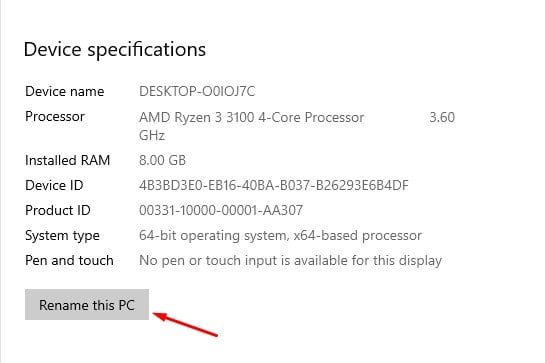
Step 4. Under the About section, click on the ‘Rename this PC’ option.
Step 5. Enter the new computer name and enter the admin account password.
That’s it! You are done. The computer name will be changed. Just restart the PC
2. Using System Properties
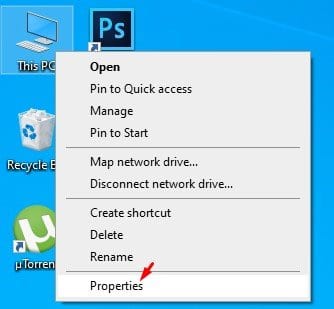
If for any reason you are unable to change the computer name from the Windows 10 settings, then you need to utilize the System properties. Follow the steps given below. Step 1. First of all, right-click on the ‘This PC’ and select ‘Properties.’
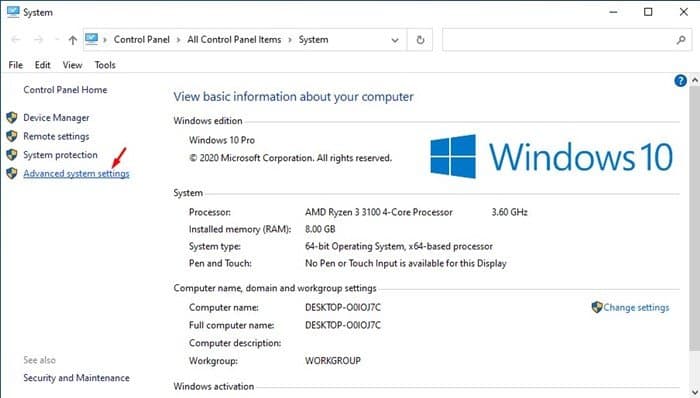
Step 2. On the left-hand side pane, select ‘Advanced System Settings’
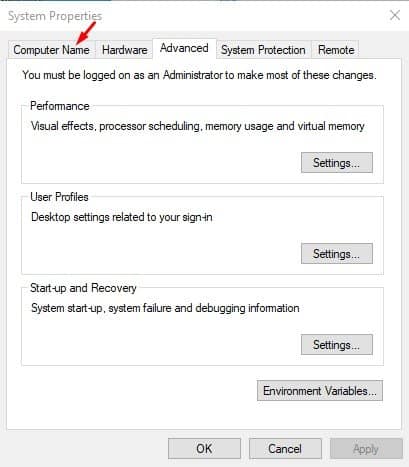
Step 3. Under the System properties, select the ‘Computer name.’
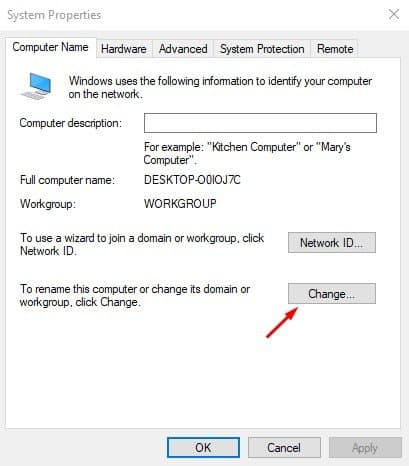
Step 4. Now click on the ‘Change’ button as shown in the screenshot.
Step 5. Enter the new name and click on ‘Ok.’
That’s it! You are done. Now reboot the computer, and the system name will be changed.
3. Using Command Prompt
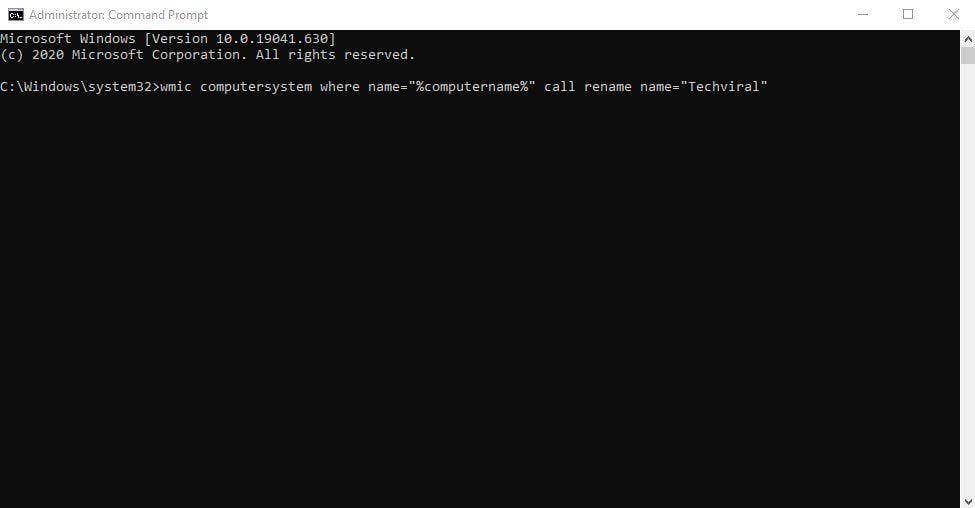
Well, you can also utilize the Windows 10 command prompt to change the system name. For that, you need to execute a simple command. Just follow the steps given below. Step 1. First of all, search for CMD in the Start menu. Right-click on the CMD and select ‘Run as Administrator.’
Step 2. On the Command Prompt, enter the given command. However, make sure to replace the ‘Computer-Name’ text with the name you want to assign. wmic computersystem where name="%computername%" call rename name=“Computer-Name”
Once done, reboot the computer to implement the changes. After the restart, you will see the new Windows 10 name. So, these are the few best methods to change the computer name in Windows 10. I hope this article helped you! Please share it with your friends also. If you have any doubts related to this, let us know in the comment box below.
Δ